Hey friends, it’s Kathleen here back with you and today I want to share a few tips and tricks for how you can easily incorporate texture and create dimension on your projects.
If you’ve been following me for a while or have seen some of my projects, you will probably know that I love mixing different textures on the same layout and also having a lot of dimension. Both are fairly easy to do but I think they help take a layout from good to great and they add a lot of interest to an otherwise more plain project.

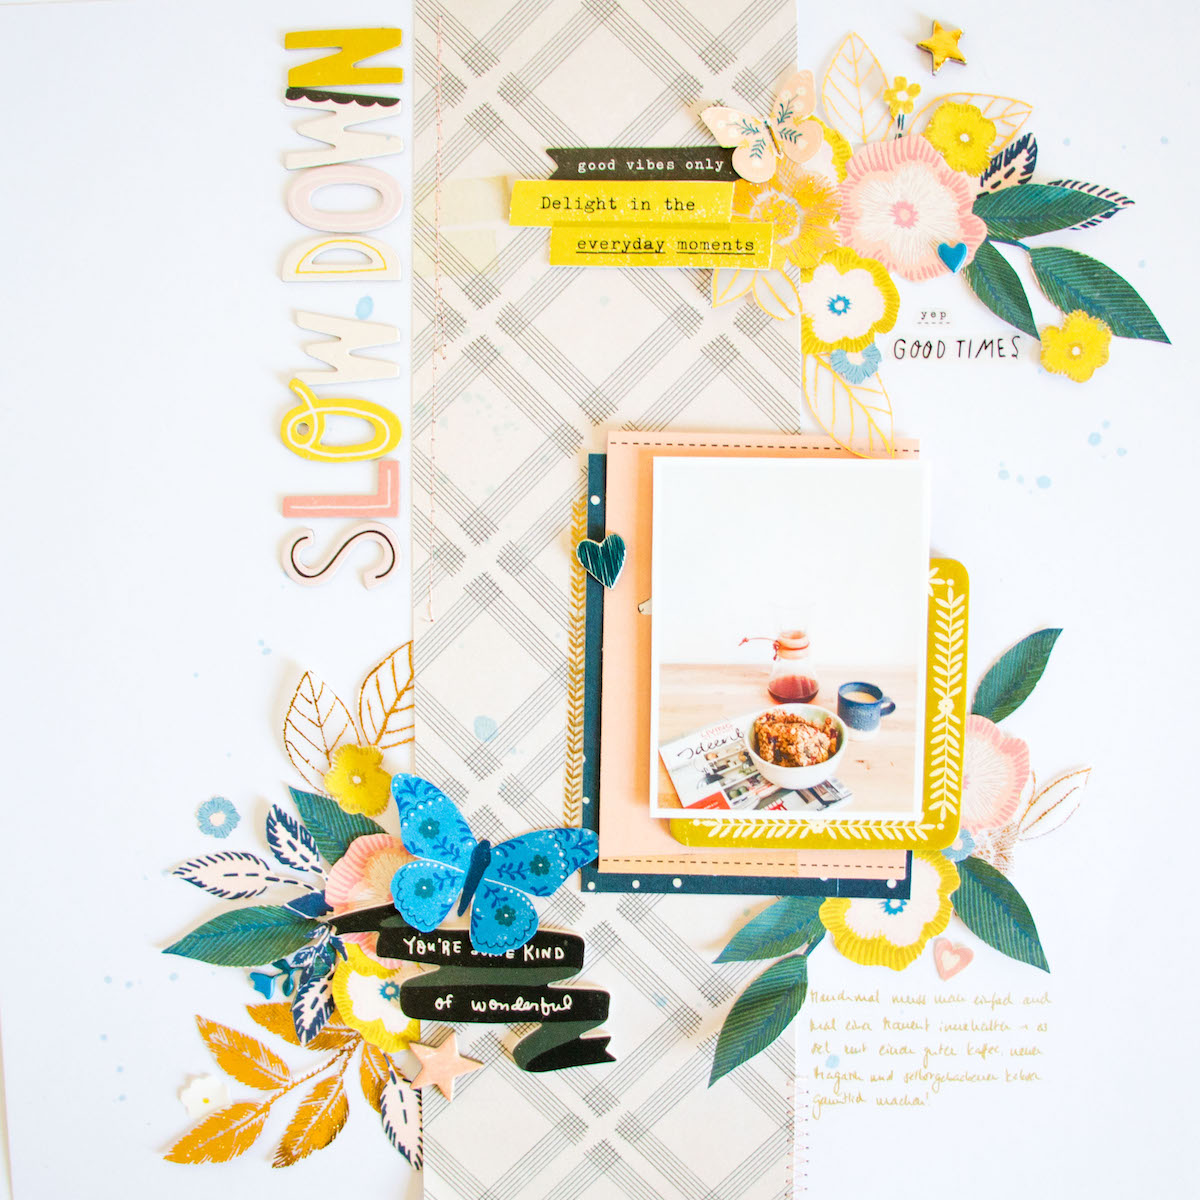
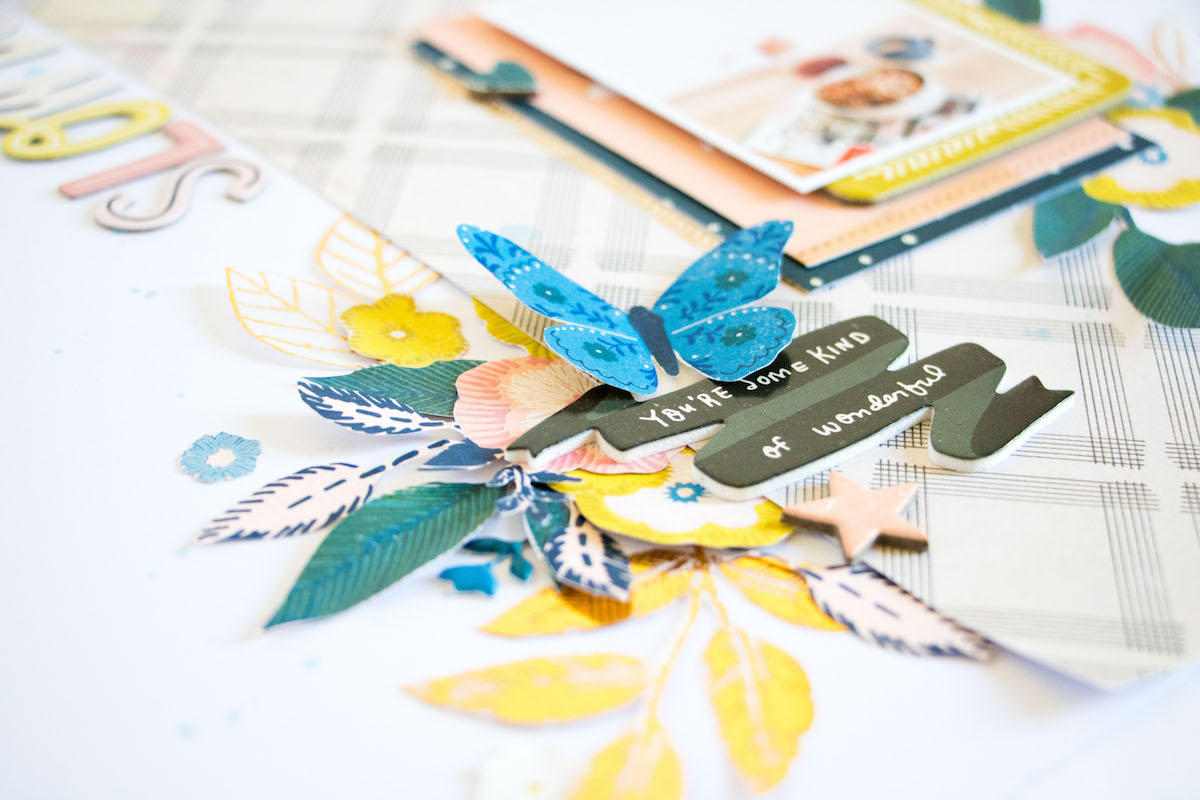
So let’s talk about texture first. This is something that probably most of us do without even thinking about it. When looking at the beautiful Willow Lane collection, for example, you already have so many different textures and finishes included in the embellishments: there are chipboard stickers, puffy stickers, rub ons, cardstock ephemera, sequin flowers, etc. So just by including pieces from a few of these on the same project, you already have different textures!
Another tip to using different styles of embellishments on your layouts is to distribute them across the page. What I mean by that is, try not to group all the puffy stickers in one clusters, all the chipboard stickers in another and then all the die cuts in a third one. Rather mix the different textures and have some of everything (or most everything) in each cluster.
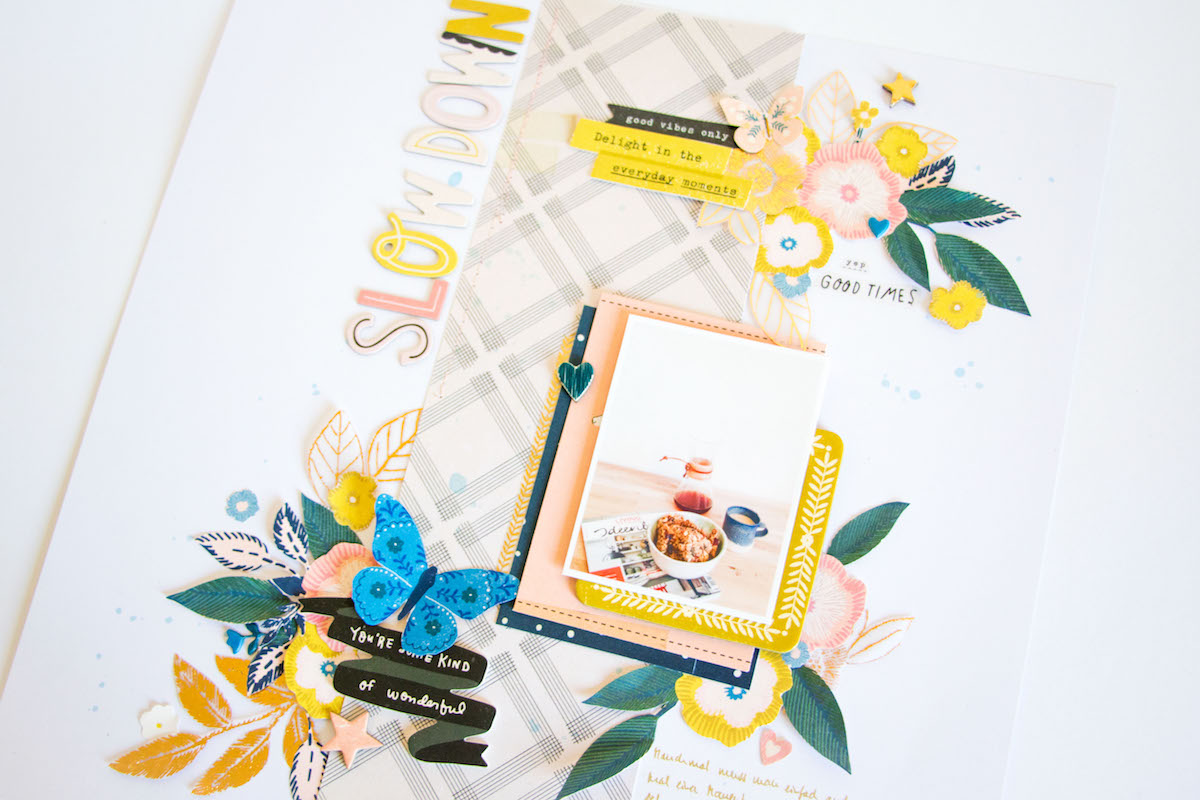

When you take a look at the clusters on my layout, you will see that each of them has some of the golden vellum flowers, as well as some of the paper flowers that I cut from the Blossom paper. Then I also mixed in some of the puffy, chipboard and/or cardstock stickers.
A few other things you can do on your layouts for some added texture would be: machine or hand stitching, using enamel accents and heat embossing.
Now let’s talk about dimension. There are a few things you can do to achieve dimension and all of them are really easy and quick to incorporate. First of all, the simplest thing would be to just layer things up, whether it’s pieces of patterned paper or embellishments.
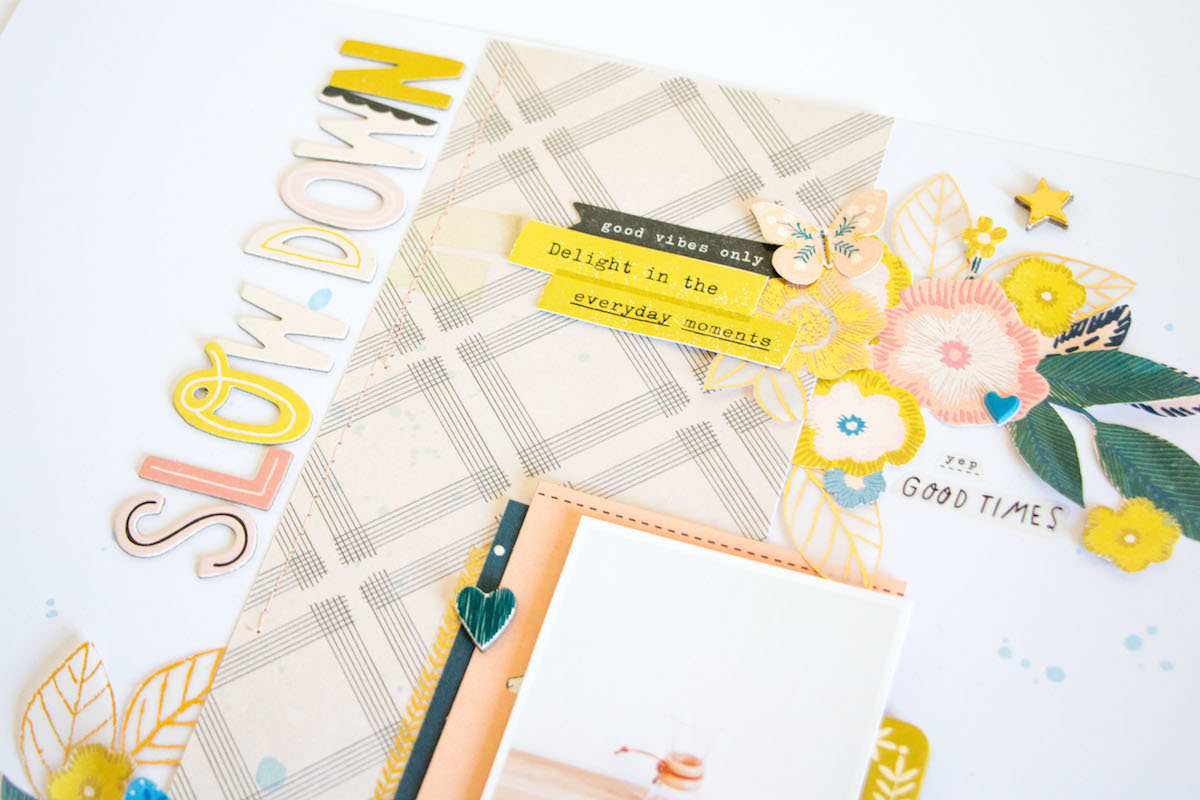
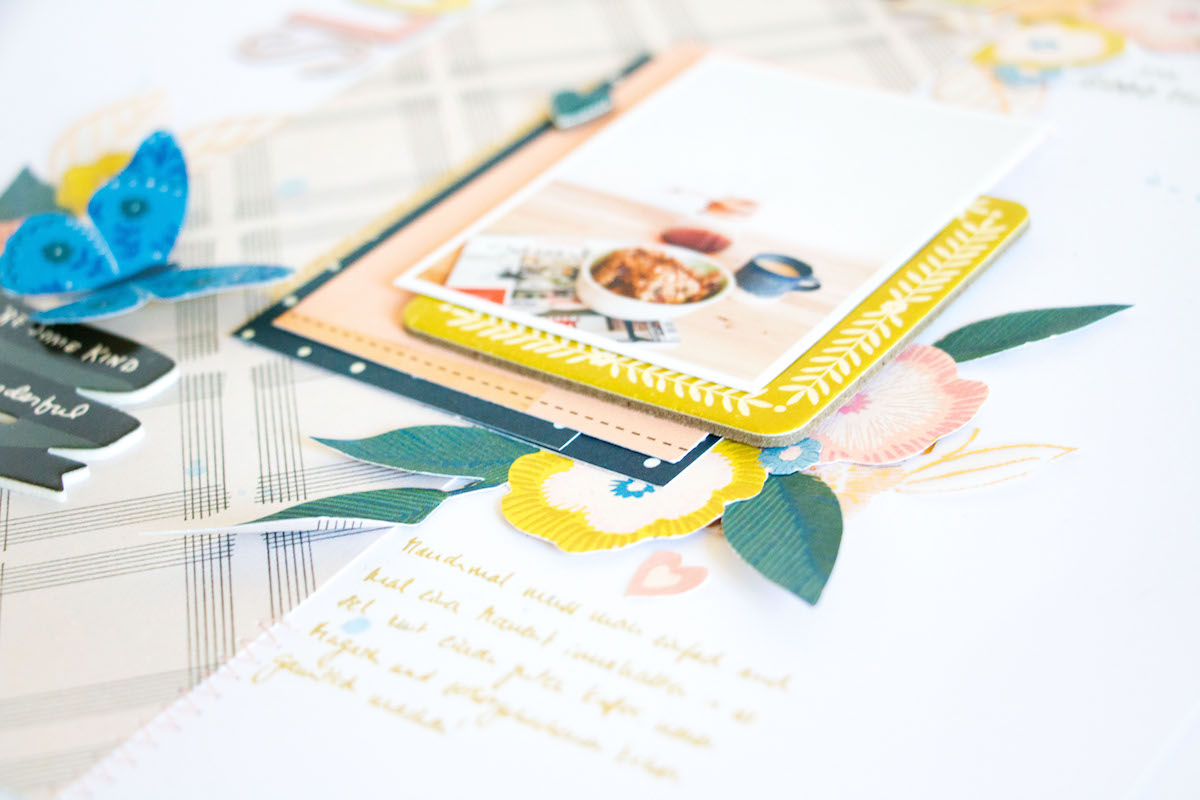
Using different thicknesses for the layers also helps to add more dimension and creates interest. In the photo above you can see that I used one of the chipboard frame stickers as a layer behind my photo to really lift it off the page and make it stand out from all of the flower clusters. The shadow that this creates around the photo even enhances that effect.
Another thing you can do, is lift off parts of the embellishments or elements on your page. Some elements of course lend themselves to this better than others, especially flowers, leaves and butterflies are perfect for it. By just curling up the edges you create this dimension and it feels like they are lifting off the page.
Make sure to add some dimensional adhesive, like foam dots, behind those parts that you want to stay lifted up so that they won’t get flattened once you put your layout in a page protector or album.
My last tip for creating dimension that doesn’t require any dimensional adhesive, is to tuck some elements beneath or behind others and have them peeking out. This creates the illusion of dimension without adding any actual bulk to your pages.
Whew, how many more times could I have said dimension in one blog post?! Haha, anyway, I hope you found the tips and tricks I shared today helpful and you will try some of them on your projects, too!
Thanks so much for stopping by!
xo, Kathleen